A valuable tool for establishing confidence in component suppliers and their production processes.
PPAP defines generic requirements for production part approval, including production & bulk materials. The purpose of PPAP is to determine if all customer engineering design record & specifications are properly understood by the organization and that the manufacturing process has the potential to produce product consistently meeting these requirements during an actual production run at the quoted production rate.
Helps to validate quality processes and design conformity. Identifies problem(RISKs) early for resolution through PFMEA Process. Reduces cost of poor quality (COPQ) through quality process control.Provides guidance for managing supplier and manufacturer changes. Prevents use of unauthorized and malfunctioning parts. Identify Potential Supplier with strong process Knowledge. Identifies supplier areas for improvement. Improves the overall quality of products & customer satisfaction.
In 1982, the management staff of GM, FCA, and Ford founded Automotive Industry Action Group (AIAG). The group then developed Advanced Product Quality Planning (APQP) & Control Plan specifications. Within these standards, AIAG developed PPAP to advance the parts production approval process of quality planning.The first manual to formally document the multiple PPAP requirements was published in 1993. PPAP is a part of the automotive industry’s overall APQP initiative. The goal of PPAP is to provide step-by-step procedures of Manufacturing Process to ensure the production of an end product will satisfy customers. Today, PPAP is being adopted by all industries.
For the automotive industry, AIAG currently governs PPAP to ensure all parties conform to the same set of standards.
A PPAP is required anytime a new part or change to an existing part/ process is being planned. This includes:</p> <p>Correction of a non-conformity on a previously submitted part Use of alternative material that was used in the previously approved part Production from new or modified tooling, including additional or replacement tooling Production following refurbishment or rearrangement of existing tooling or equipment Production following any change in process or method of manufacture Production from tooling and equipment transferred to or from a different plant location Change of source for sub tiers parts, material or services (e.g., heat treatment, plating) Product that was not produced in the last 12 months or more Change in test or inspection method & for additional capacity (additional production line/Location).
The PPAP manual is the ultimate resource for those in automotive supplier quality management. The manual contains the PPAP checklist, which includes all the requirements, called elements, for a complete PPAP package. The checklists identifies different PPAP levels (from 1 to 5). For those in the automotive industry, there are 18 possible elements that must be checked off. The aerospace industry has a similar set of elements to be completed during the development, planning, and design of the production process. Each PPAP level determines the specific requirements for each element and indicates which elements should be submitted to the customer. It is important to note regardless of PPAP level, the supplier must complete every applicable element with respect to PPAP submission levels.
Customers specify how detailed they want suppliers to be with PPAPs through submission level requirements. Any combination of the following requirements comprises each level: PSW, part samples, limited supporting data, complete supporting data, customer proposed requirements, and review at manufacturing location. Levels clarify customer requirements to suppliers the amount of evidence that should be included in their submissions.Level 1: Part submission warrant (PSW) only (and for designated appearance items, an AAR) submitted to the customer Level 2: PSW with part samples and limited supporting data Level 3: PSW with part samples and complete supporting data Level 4: PSW and other requirements proposed by the customer Level 5: PSW with part samples and complete supporting data available for review at the supplier’s manufacturing location.
PPAP is similar to a strategic project plan; it is the direct negotiation between a customer and supplier that confirms how each PPAP element is satisfied. Not every PPAP is the same; therefore, negotiation must take place prior to accepting the requirements and initiating the process. This ensures that both parties have the same expectations. In many cases, the supplier will have an established report/document like a control plan, FMEA, SPC, MSA etc. that will help guide the customer through its process. If the already established report/document by the supplier is found acceptable by the customer, the same documents may be duplicated and reused by the supplier in the future.
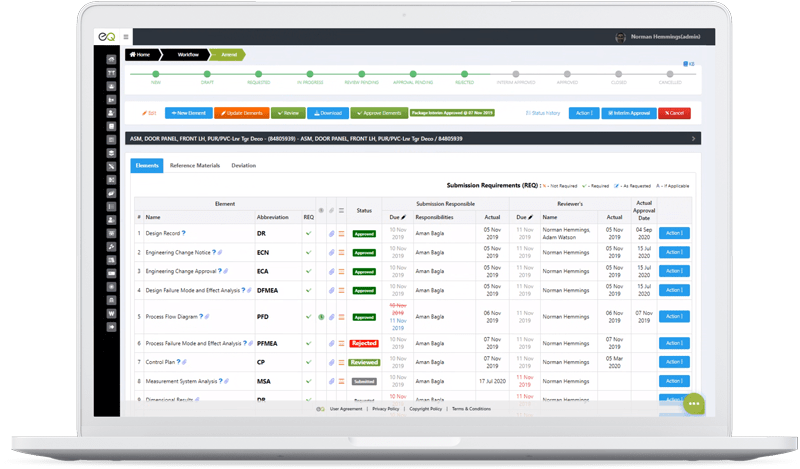
1.Design Record: Copy of drawings(each feature and notes are ballooned),technical specifications/standards 2.Engineering Change Documents, if any: outlines any changes to the design and are usually included within engineering change documents. 3.Customer Engineering Approval, if required: Contingent on requirement. The approval comes from Sample/Proto part production trial in the customer’s manufacturing plant. 4.Design Failure Mode and Effects Analysis (DFMEA): Looks at the probability of part failure from design and its effect on the intended function of the product.5.Process flow diagrams: Graphical outline of the steps & sequence of the manufacturing process for a part from start to finish to meet the customer needs, requirements & expectations.6.Process Failure Mode and Effects Analysis (PFMEA): It is a disciplined review and analysis of a new or revised process and is conducted to anticipate, resolve, or monitor potential process problems for a new or revised product program. 7.Control plan: The control plan is a written description of the systems for controlling production parts and processes. The production control plan is a living document and should be updated to reflect the addition/deletion of controls based on experience gained by producing parts (Approval of authorized customer representative may be required) 8.Measurement System Analysis (MSA) Studies: It is the statistical method used to know the variation in the measurement system, which includes Gauge R&R, Linearity, Stability, Bias, Kappa, etc. 9.Dimensional Results: shows physical part measurements meets drawing requirement. 10.Material, Performance Test Results: A summary of all the tests performed on the part as specified in the drawing. 11.Initial process studies: includes all SPC charts to prove processes producing critical/significant characteristics have stable variability.
1200 Stephenson Hwy
Troy, MI 48083
.